Saturday, January 11, 2014

Haystack Enchiladas

Here is another way to prepare Enchiladas.  This is Mex-Italian Fusion, sort of.  Rather than rolling the Enchiladas we are going to stack them up like Lasagne.  I'm using my Chile con Carne, a mild Cheddar Cheeze, Mayan Sweet Onions (diced), and White Maise Tortillas.
Its a stacker process.  Tortilla, Chile con Carne, Onion, Cheeze, and repeat.  The pan I am using there is a Fajita Comal, oiled with some Olive Oil.  This recipe is scalable, so you can make one portion, like here, or get a 13x9 Casserole, and make an entire Mexican Lasagne.  Also, the toppings are free form, so add whatever you like, Jalapenos come to mind, or Olives, Whatevarz...  Then to the meltification machine...
That'll bake for around 10 minutes at 425 degrees F, and I'll make the Ensalada in the meantime...
The Ensalada is thinly sliced green Cabbage with Cilantro.  Then I'll use Olive Oil and Lemon juice to dress it.  The chopped Tomatoes are the garnish at the end of the assembly process.
The Haystack Enchiladas are done meltifying, and I'll add a side of Salsa, and the Yogurt Ranch dressing.
Then add the Ensalada, and the garnish, and BAM!  Mui Delicioso Nom Noms...

Winter Garden

The garden is mostly bare at the moment.  There is some lettuce, and herbs left from last year, but the recent Ice Storm has taken out every thing else, except the typical Winter weeds.  So, its time to start the spring vegetables.  The recent rain has made the soil pretty soggy, and this is good for starting seeds.
Winter vegetables that will do well in late Winter, early spring are the Cruciferous Vegetables such as Cabbage, Broccoli, Kale, Carrots, Radishes, and oily herbs like Cilantro, and Parsley.
I'm not going to Till the garden at this point.  Rather I am going to rough up the soil with the Action Hoe, and pull out the weeds, then sprinkle the seed on the ground, and then smooth the soil out with the Hard Rake.
It doesn't look like I have done much here, but in a few weeks there will be sprouts amongous.  I overseeded the area, and when it comes time to thin out the growing space I will have lots of microgreens...

Tuesday, January 7, 2014

Kimchi Cheezeburger

I didn't know this already existed, and was thinking that it was something new.  In hindsight, searching teh interwebs, I found that the Kimchi Burger is quite popular already.  So here is my version of the Kimchi Burger with my homemade Kimchi.
I'm going to start with a pound of 80/20 ground chuck, season it with Sea Salt and Pepper, then mix, and divide it into half pound rectangular patties.  The rolls I bought are sandwich rolls and not hamburger buns.
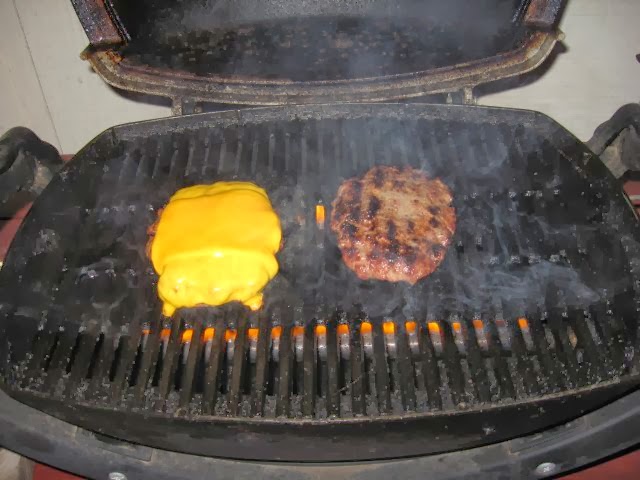
Then once the patties are formed I'll season them again with Tony Chachere's season salt, and pepper.  I recently got an adapter hose for the Baby Q so that I can hook up a 20 pound LPG tank, and I have seemingly unlimited cooking time now.  Before I was using one pound bottles, and I found they run out at the worst time possible, like right in the middle of cooking.
Now I don't have to worry about the gas running out in the middle of searing the Beefz.  The Baby Q lights fast, heats up fast, cooks fast, and when I am done I can just turn it off, and don't have to wait for the fire to die.  Plus it can hit really high temperatures to make those beautiful sear marks on the Beefz.
Prior to putting the Beefz on the grill I had put some french fries in the oven, and am using a griddle to toast the rolls.  I had cut the roll in half, lengthwise, buttered them, and place them cut side down on the griddle.
A couple minutes before the Burgers are done I add a couple slices of Cheddar Cheeze.
Now for the assembly process.
I picked spicy brown Mustard, and Yogurt Ranch for the spread on the roll.
The burger goes on the Mustard side, and the Kimchi will go on the Yogurt Ranch side.
The new batch of Kimchi is milder, and more flavorful than the previous two.  Altogether this is really good.

Friday, January 3, 2014

Saturday, December 28, 2013

Kimchi 3

Third time is the charm, right.  My first Kimchi was way too hot, and garlicy.  The second Kimchi I took care not to put too many chiles and garlic in it, and it was better, but still way too hot and garlicy.  I had also overlooked the use of Ginger in the first two attempts.  So, now, I have been contemplating a new batch for a while, and I decided to use a lot more Chile, but a mild Chile.  There are four components to the Kimchi sauce, Chile, Garlic, Ginger, and Fish Sauce.  They should all be in proper proportion so that you can taste all the components, without one of them overpowering the others.
First I prepared the Napa Cabbage by rough cutting up a whole head, and then brined it in five percent salinity solution.  In the Brine is where the fermentation process begins.  I let the Cabbage brine at room temperature for three days.  During this time you will see evidence of the fermentation process as Carbon Dioxide bubbles will form amongst the Cabbage leaves.  If you compress the mass of Cabbage in the Brine you will see these bubbles fizz up around the Cabbage.  Now the Cabbage is ready and we'll start the Kimchi sauce.
The Brine for the Kimchi contains three tablespoons of Sea Salt, in a quart of Vitalized Water, to form a five percent salinity solution.  We will use some of this Brine in the sauce making.  We will also use four ounces of mild New Mexico Chiles, fresh Garlic, half a white Onion, a quarter cup of Fish Sauce, and about a cup of the Brine.
I'm going to steam the Chiles for about 30 minutes to make them more pliable, and to bring out the flavor.
While the Chilies are steaming I'll peel the Ginger, Garlic, and Onion.
Next we'll drain the Brine out of the Cabbage, reserving it for later.  The Chiles are done steaming.
I grated a couple nubs of the Ginger, and its a about three tablespoons.  The Garlic is rough chopped because it will be going into the food processor with the Chiles.  The white Onion is just sliced, and will go straight into the Cabbage with the Ginger.  The Chiles get their stems and most of the seeds removed.  These are mild Chiles, so you don't really need to worry about removing the heat, I just don't want too many seeds.
The Chiles, and the Garlic go into the Food Processor, along with a quarter cup of Fish Sauce, and a cup of Brine.  I started with a quarter cup of Brine, but needed more liquid until I could get the machine to process correctly.  I processed the mixture until it was mostly smooth, with some small pieces left.
Get the biggest mixing bowl you own for this part.  Add the Cabbage first.
Add the Onion, and the Ginger to the Cabbage and mix it up really good.
Next, add the Chile, Garlic, Fish Sauce mixture, put on some vinyl gloves, and mix well...
At this point the Kimchi is finished, and is edible, but its not going to be right for a few days.  It will take a while for the flavors to meld, and fermentation to start up again.  You can speed up the process by letting the Kimchi sit at room temperature for some time, but not more than 8 hours.  Store the Kimchi in its storage vessel during fermentation.  After the fermentation starts again store the Kimchi in the refrigerator.  It will keep fermenting, but at a slower pace.  Kimchi lasts a long time in the refrigerator, like pickles.

Monday, December 23, 2013

Taco Eggrolls

Tex-Asian fusion strikes again...  LOL!  It was just a matter of time before I did this, and I think they are both the same concept from different hemispheres.  Taco stuff in an Eggroll wrapper.  A Chimichanga is a deep fried Burrito with a flour wrapper, kinda like this.  The Eggroll wrappers have a little different texture.
Really this satisfies my need to deep fry stuff.  At least I'm not deep frying candy bars.  There are some things that do not do well in the deep fryer, iceberg Lettuce is one of them, and fresh Tomatoes, both have a little too much water content.  We want to contents of the Eggroll to be stable in the fryer, and not disintegrate.
So, the salad component of the Taco Eggrolls will be green Cabbage, and white Onion, both sliced thin.
I've set up an assembly station here to bang out a bunch of Eggrolls.  The Taco meat is ground Beef with a Taco mix that was made a couple days ago, and reheated.  I'm also using a mild Cheddar Cheeze.
Add some Taco Beef first, and use a moderate amount, so as not to overstuff the Eggroll.
Then add some of the Cheddar, again moderately so we can close the Eggroll.
Next is a little of the salad mixture, keeping everything in the middle of the Eggroll wrapper.
Roll the corner of the Eggroll wrapper over the filling, apply an eggwash on the edges of the Eggroll wrapper, and fold the side corners into the center.  Apply a little more eggwash to the remaining exposed parts of the Eggroll wrapper, and then roll it up.
The eggwash is a scrambled egg that I apply with a sauce brush.  Repeat the assembly process as required.
I made six, more than I need, because I feel like I'll have some fallout here.  Or potential leftovers.
Fill the Wok about a third of the way with vegetable oil, and bring it up to around 350 F.  I am not measuring the temperature precisely, and am looking for hot, but not smoking hot.  The actual temperature of the oil will vary a lot when you add the relatively cold Eggrolls, as they cook, and the recovery time between batches.
It will only take a couple minutes per side.  The meat in the Eggrolls is already cooked, and we only need to steam the salad mix slightly.  We are really only looking for the Golden, Brown, and Delicious on the outside.
Delicious they are.  I think these qualify for Munchie Food, uh, huhuuhuuhhuuh...  I had made some Chipotle Salsa that will work great with these, and the Yogurt Ranch dip will cool things off when you get too much heat.  I'm gonna have to try this again with a Green Chile Cheeze Eggroll, or a Chile Relleno Eggroll...

Hot and Sour Noodles with Shrimp

Looking to make something else with my homemade noodles I hatched a plan to fuse them with Hot and Sour Soup.  The Hot and Sour Soup in something I make when I am feeling under the weather.  Its been cold and rainy here lately, and this seems to fit right today, with a fire in the fireplace.
We'll start with the soup part here or in the case the sauce for the noodles.  So, the first thing in the pan is Essence of Pork, rendered Bacon fat.  I'm using about one and a half tablespoons.
The spoon in the picture is extra large, like a serving spoon.  Then add sliced Mushrooms and Onions.
This is starting like a lot of other sauces I make.  We'll let these cook a while.
Then add sliced Garlic, red Chile, and black Pepper, this is the Hot part.
Then sprinkle in a tablespoon of Four, and mix it in thoroughly.
Let the Flour cook down a while, and then add the liquid component, in this case Beef stock, it what I had.
The salt component is going to be Fish Sauce, and the sour component is Lemon juice.
When I squeeze the Lemon juice into the sauce I'll use a strainer to keep the seeds out of the sauce.
I'll let this mixture come up to a simmer while I go work on the noodles.
The homemade noodles only take a few minutes to cook.  I've thawed some cooked shrimp as well.
Right at the end of the cooking process I'll add the Shrimp.
Then add the noodles.
Then mix it together and serve.  Hmm, take that, cold rainy day...