Tuesday, November 29, 2011

Thanksgiving Turkey

The Big Bird, yeah, we ate him.  A hardwood smoked Turkey is the centerpiece of our Thanksgiving meal.  This is the thirteenth or maybe fourteenth Turkey I have done for Thanksgiving.  I usually buy a frozen Turkey five days before Thanksgiving.  It will thaw in the refrigerator for three days, and spend two days in the brine before going into the smoker.
I'll cook it directly in the smoke for two hours to get the smokiness in the meat, and then tent the whole bird to finish the cooking.  I prepare a roasting pan by lining it with heavy duty foil.  The Turkey is on a rack that fits the roasting pan.  Then the Turkey and the rack go into the roasting pan.
I have prepared a double sheet of heavy duty foil by folding the edges together, making it double wide.  This will be the tent that goes over the top of the Turkey.  At this point, in the picture above, the Turkey looks finished, but it will take another couple hours for the internal temperature to come up to a safe level.
After putting the tent over the Turkey, I'll crimp all the edges closed to prevent the smoke from getting to the Turkey.  At this point it has enough smoke, and only needs the heat.
So all that is left is to watch the thermometer, and wait for it to get to 165 degrees Fahrenheit in the center of the breast meat.  After the Turkey gets pulled out of the smoker it needs to rest for an hour or so to let the juices settle down.

I didn't get any table side pictures this year.  Everything was too crazy once all the peeps got to the house.  Last year's Turkey was perfect in the breast meat, but the dark meat was a little under done.  This year the dark meat was perfect, but the breast meat was a little over done.  You really can't get a whole Turkey totally perfect.  To get the whole bird perfect you would need to quarter it, and cook each piece to temperature.  Something to think about for next year...

Monday, November 28, 2011

Mystical Nom Noms

Sometimes all the right pieces fall into all the right places, and creates an epiphany state of mind.  I found Kokopelli, the God of the Anasazi Indians, and He was right in front of me, literally.  I could only paraphrase his description, so I'll leave this link if you want to learn His story, Kokopelli.  He is the Fertility God, Prankster, Healer, and Storyteller.
So, there is a long string of events that turned me this way and that way, goes around to Ancient Aliens, and back to Wingmakers, then over to Rosemeade Market, up to the Cosmic Paradigm, and ends in my own kitchen.  I came close to the revelation a few times, but never put it all together until now.  About four years ago I went to Red River, New Mexico, and I was pretty close there, but still far away.

The Wingmaker's book, Ancient Arrow starts with an experience of a woman who is the leader of an Indian tribe of Self-Knowers, known as the Chakobsa, later to be known as the Anasazi.  I was within a stones throw of that land four years ago.  I have been studying the spirit for a couple of decades now, and have had spiritual epiphanies before, but not of this magnitude, or coherence.  You find bits, and pieces, little keys, pick them up, hold on to them.

So the word Anasazi has been festering in my brain for some time.  Later I find Amaranth and Quinoa in a similar way, they are a couple of grain bearing plants that Indian cultures like the Inca, and Mayans were interested in.  The Chakobsa were descendants of the Mayans.  These Indians are still over there, one state over, and today the most predominant tribe in the area are the Hopi.  They have been giving us clues, waiting for the paleface to wake up.  I am kinda embarrassed that it took me this long to find Kokopelli.

So, we picked up some Indian art when we were in Red River, well on that trip anyway.  They are ceramic tiles with hand painted figures on them.  One has a Chile Ristra, one has the Sun God, with a Chile Ristra in front of it, and the last is Kokopelli.  So, last week I am cleaning the house for Thanksgiving.  Trying to be in a good mood, despite the huge amount of work we do before Thanksgiving, and I find these tiles.  I think, these are cool, I should put them out for Thanksgiving, and they have remained behind the stove every since.

I have made a few posts about the spiritual significance of food, and how these relate to our physical well being, and mental acuity.  The mysteries of life are not there to endlessly perplex us without solution, we are meant to figure these things out.  One of my fist posts, Grains of the Gods, explored the history of Quinoa, and how it was very important to the Mayans.  But I didn't see the spiritual significance.  Another post, Red Chile Bread, I used Quinoa to make Red Chile Bread, which has other spiritually significant foods, Chile and Pine Nuts.  Then the last piece of the spiritual culinary puzzle is the Anasazi Beans, Anasazi Bean Chili.  I caught Kokopelli in the picture with the Chili, and I didn't know who he was at the time.

It wasn't until I ate all three of these foods together that I had this epiphany and found Kokopelli.  It was a flight of contemplation that put pieces together that were accumulated over a 5 year span, that made me realize not just the spiritual significance of food, but also our physiological dependency on the right foods and the terrible sacrifice we make by eating the wrong foods.  All things are tied together, and work together like Kokopelli is The All, One.  We are all part of The All, we are all Kokopelli, together we are One.

Athletes eat to enhance their performance.  High quality proteins, and potent vitamins increase their physical prowess.  Great thinkers optimize their diets to boost their mental capacity with "brain foods".  What if we can increase our spiritual awareness by eating foods that are optimal for that process?  The Wingmaker's materials suggested that our DNA was damaged intentionally by a race of beings that wanted to use us as slaves (The Annunaki), and that the repair of the DNA would return latent, long lost powers that are mystical to us today, but should be as autonomic as breathing to us.  Can we repair our DNA, and regain these lost powers, such as telepathy, telekinesis, mental healing, and teleportation?

There have been many people that have scratched at these ideas.  David Wilcock believes that we are in the middle of an evolutionary cycle that will literally mutate us into a more evolved species.  But it may be that we are returning to the way we once were.  My epiphany was generated by lunch today.  I had the last piece of my Red Chile Bread, a cup of Anasazi Bean Chili, and some homemade Pico de Gallo.  I was musing about these ancient foods, and looking for Anasazi Glyphs on the interwebz when I found Kokopelli, and put all this together.  The combination of Anasazi Beans and Quinoa is probably one of the most perfect foods for a human, but what if its more.  Then there are the Chiles, and Pine Nuts in there also, all spiritually significant foods.  What if its a catalyst that allows our spiritual awareness to exponentiate, or provides the raw materials to repair our "broken" DNA as the Wingmaker's materials have suggested?

Kokopelli knows, and he whispered it in my ear...

Chile Harvest 2011

Last night was the first freeze of the season.  So, yesterday I spent several hours picking the last of the fruit out of the garden.  Root vegetables are not as susceptible as the fruits, so I still have some time before I have to harvest them.  But the fruits will get frost damaged, so I picked the plants clean, taking ripe as well as immature fruit.
This, if anything, is Christmas to me.  The bountiful abundance of red and green chiles at the end of the harvest time, right before the fist freeze.  Coincidentally, I am also hanging up Christmas lights today.  See the connection there?  Red and green lights?  Red and green chiles handing off of Chile plants?  I don't know if there is an actual connection there, but it sure seems apparent to me...
My Habanero Chiles were planted in a shady spot this year, so there are relatively few ripe Habaneros.  The green ones will sit around a while, until they turn orange, and then get dehydrated for use as a spice.  I rarely use fresh Habaneros cooking, they is just too hot.

The red Cayenne Chiles will get washed, and go directly into the dehydrator.  Cayenne Chile is probably my favorite spice.  Again the green ones will have to sit around a while to mature, and turn red.  They will turn in a week or so, and then get dehydrated.

The Jalapeno plants didn't do very well this year, and I don't know why.  I only had a few that actually ripened, and most were very small.  These green Jalapenos will get pickled.  They are a constant table side condiment at my house.  Nachos anyone?

The Anaheim Chiles usually get used like fresh vegetables, although can be dehydrated and used as a spice as well.  They have a lower heat level, but more of that green Chile chlorophyll taste, so they go good in dishes that need some green chile, like Pepper Steak, or chile Rellanos.  The red Anaheim Chiles usually get dehydrated and ground to become what is commonly know as Chile Powder, which is the base of Chili, and Enchilada sauce.

Then there are the Tomatoes, my poor, pitiful Tomato harvest this year.  I have no explanation for why my Tomato harvest was so pitiful this year.  One thing is reduced light, I have an Live Oak Tree which has been slowly usurping the light space in the back yard over the past decade.  My garden hardly gets any afternoon sun anymore.  I only had a few Roma tomatoes, and Better Bush Tomatoes, and they are all green.  They will have to sit a while and ripen.
In this little animation you can see how I load the dehydrator.  The chiles go through a wash, and immediately into the dehydrator.  It will take 8 to 12 hours to dehydrate them, and then they are preserved for the long haul.  I have chiles that are 5 years old, still perfectly preserved.
Then there are the trays of chiles that need to continue to ripen before we put them in the dehydrator.  As these get ripe they will get a wash, and then take a ride in the dehydrator.

In addition to all the harvesting I also pulled out all the Christmas stuff, and got the house into Christmas mode.  It usually takes a full day to get all of that done.  So, altogether, it was a fruitful Sunday, lol, get it?  Happy Jala'days!  LOL!  Chile-mas...

Anasazi Bean Chili

Funny looking cousin to the ubiquitous Pinto Bean is the Anasazi Bean.  It has red and white splotches all over it.  After they are cooked they are a dingy pink color.  The name Anasazi refers to the Indian Tribe that cultivated these beans in the Four Corners region of the United States.  Those of you who watch the Ancient Aliens series may also be familiar with the Anasazi because of their cave drawings of Ancient Astronauts.  Two things that make these people interesting to me, Beans and Ancient Astronauts...

Anasazi Indian cave dwellings
Anasazi Indian Ancient Alien Petroglyphs
There is some information about the Anasazi Indians here...
OK, back to the Chili.  I soak the dry Anasazi beans for about 6 to 8 hours in 4 cups of Vitalized Water.  This allows the beans to start to sprout right before cooking them.  Soaking the beans first is supposed to help alleviate the bean music afterwards.  Beans like to be cooked low and slow, so we are starting the heat at about 30 percent, and just let the beans take their time, don't rush them.  Once they come up to a boil I add 2 teaspoons of Sea Salt, reduce the heat to about 15 percent, and let them simmer for an hour.  Meanwhile dice some White Onion, Garlic, and Chiles.  Quantities are up to you.  I like less Onion, and more garlic and Chile.  I harvested Chiles yesterday, so I have a plentiful variety of Chiles for my Chili.  I wound up using 2 large, fresh Cayenne Chiles, and 1 large, red Anaheim Chile, so its not super spicy.  Then I added a couple of tablespoons of Caldo de Pollo to add to the flavor.  Mix the Chili together thoroughly, and let it simmer for another hour.
I have some leftover Ham from Thanksgiving that I added in the serving bowl, and a few Scallions on top.  Anasazi Bean chili is Mui Delicioso, uh that means Nomlishious for you Gringos...

Ale Pizza Doh

The idea to use Ale to make Pizza Doh wasn't too bad.  I could probably work with this a little more, and make it better.  I made the basic Doh with 12 ounces of Ale instead of Water.  It is certainly more yeasty.  It rises more while cooking.  The basic recipe is 12 ounces of Ale, 2 teaspoons of Sea Salt, 2 teaspoons of granulated Sugar, 2 teaspoons of bread machine Yeast, and 4 tablespoons of Olive Oil.  Combine all the ingredients in the Stand Mixer bowl, and knead with a Doh Hook for 10 minutes.  After kneading oil the Doh Ball, and place in a oiled bowl to proof for an hour at room temperature, or place in the refrigerator to be used within a few day.  I put mine in the fridge for a day before I used it, and the Doh doubled in size...
I didn't get any finished shots of this Doh.  I had peeps over, and was busy making pizzas and stuffz...

Thanksgiving Practice

Before Thanksgiving I need a little practice to get back into the traditional cooking mode.  Its one of those times where my Tex-Asian fusion cooking just doesn't go over well.  Like the time I made a Chile Crusted Pork Loin instead of a Turkey, I found out just how many Gringos were in the family.  So, for my warm up Thanksgiving Practice Dinner I made a Roasted Chicken, with Cornbread Stuffing, and Mushroom Pan Gravy.  On the practice dinner I get to use Chiles, but not on the Thanksgiving meal.
The butterflied Chicken is seasoned with Tony Chachere's Season Salt, and fresh cracked Black Pepper.  Then its roasted in the oven at 400 degrees Fahrenheit for an hour.  While its roasting I'll put together the Cornbread Stuffing.  I'll make a small batch of Cornbread, bake it off, and let it cool.  Then crumble the Cornbread so I can mix it with the rest of the ingredients.  The recipe I made equates to about half of the original recipe.  Then I took some Pane Toscana, about 3 thick slices, and cubed them.  Combine with the Cornbread crumbles in a large bowl.  I saute some diced Onion, Celery, Garlic, Jalapeno, and Cayenne, then add them to the crumbles and bread.  Then add salt, pepper, 1 cup of chicken stock, and half a cup of milk, mixing thoroughly.  Dump the mixture into a 9" x 13" Pyrex baking dish, smooth it out, and bake it for 30 minutes at 400 degrees Fahrenheit.
When the Chicken is done roasting we scavenge the pan drippings to make the Mushroom Gravy.  The Chicken goes to a plate to rest, and the pan dripping will go into a sauce pan.  I will saute the sliced Mushrooms in the sauce pan first.  Then pull out the Mushrooms to make the gravy.  Add the Chicken Fond to the sauce pan, and then add about a tablespoon of flour to the Chicken Fond.  Whisk the slurry together thoroughly over medium heat.  As it thickens add some Chicken stock and continue whisking.  Keep adding Chicken Stock a little at a time, and whisking, until you reach the target consistency.  Reduce the the heat to low, and add the Mushrooms back into the gravy.  Now its time to assemble the dinner.
To me, this is what a Thanksgiving dinner should be, coordinated, and matching.  Pot Luck Thanksgivings are not what it is supposed to be.  The meal should be planned, work together, and not be a Smorgasbord.  Poultry, Stuffing and Gravy is the prefect mix for Thanksgiving...

Monday, November 14, 2011

UABMM2 New Mount

Back in the Metal Shop on 11/11/11.
Taking all that funky numeric synchronicity and
channeling it into metal working...
So at 11:11 AM on 11/11/11 I was shredding metal...

\m/___(O.o)___\m/

Sausage, Biscuits, and Gravy

I can't deny my country boy roots.  Sausage, Biscuits, and Gravy is one of those things I just gotta have every once in a while.  On the weekends, I prep cook sausage for my breakfast burritos .  The pork fat that renders out of the sausage is perfect for the roux in the gravy.  I do this so often that I really don't need to measure things now.  I breakdown the sausage into small chunks in the pan while it is cooking.  When all the sausage is brown I remove the sausage from the pan using a slotted spoon, leaving the pork fat in the pan.  Then add enough flour to equal the pork fat, and whisk it together thoroughly.  When you know what a roux is supposed to be like then it is easy enough to add flour until the consistency is right.  If you accidentally add too much flour, you can always balance the roux by adding a little more pork fat.

The roux needs to cook for a while, over medium heat.  As it cooks the flour will become more brown, and we don't want it too brown for a country gravy.  So, cook the roux for about three to five minutes.  Then add the milk, a little at a time, whisk it in thoroughly, and allow it to come to a boil before adding more milk.  As the gravy comes to a boil it will thicken.  If it starts getting too think, add some more milk, and whisk it in thoroughly.  Add a little salt and freshly ground black pepper.  At the point where the gravy seems to be the perfect consistency, then reduce the heat to low, and let simmer a little while longer.  Let the gravy simmer for a final five minutes, while assembling the rest of the stuffz.  Right before serving, check the thickness of the gravy one more time, and add a little more milk if it seems too thick.

For this one I have split two biscuits in half.  You don't need to add butter to the biscuits because the country gravy is the substitute.  Then I'll add some of the sausage crumbles on top of the biscuits.  Spoon the gravy over the biscuits, and add some scrambled eggs in the middle there.  Add another grind of black pepper on top, and a little season salt, and there you go...

Breakfast fit for a King...

Wisconsin Nachos

Every year around the holidays I crave Kaukauna Port Wine Cheese and Triscuit Crackers.  Its one of those quintessential holiday things, probably why that stuff is so expensive.  So, like everything, I have to put some Chiles on them.  Take a Triscuit cracker, spread some cheese on it, then a slice of pickled Jalapeno, and thus the Wisconsin Nacho.  Those are home grown and home pickled Jalapenos.  I wonder if they make a Red Chile Kaukauna cheese?

Monday, November 7, 2011

UABMM2 New Mount

After the disappointing test of the UABMM2 last week I was ready to stop working on it.  A large amount of work and money had been expended on it, and there were no results to be had.  So after a few days of being disappointed I realized that the potential of this device is great, and this was really a small set back.  So I began gathering materials to build a new, stronger mounting system for the UABMM2.  The shaft needed to be much stronger, but also the way that the rotor mounts to the shaft needs to be much stronger.  Here is a shot of the new materials.
I am doubling the size of the shaft, from 1/4 inch to 1/2 inch.  Then we'll need 1/2 inch bearings, and new bearing mounting plates.  The hardware to hold the rotor was a bit of a puzzle at first, but after some research I found a split taper bushing.  A split taper bushing is designed to hold a pulley, sheave, or sprocket to a shaft.  Its a hefty chunk of metal that has a precise hole in it for the shaft and then a couple of grade 8 screws to hold the rotor to the bushing.
For the bearing mounting plate I used another couple of AMS4051, or 6061 Aluminum, 1/4 inch plates, the same plate that is used to fabricate the UABMM2 rotor, and stator.  They are high tensile strength, and are also fairly easy to machine.  Both plates will be identical, so I can machine them concurrently, which will also let them be identical after they are machined.  I had marked up the plates a couple of days ago, and got them on the Mini-Mill last night.  In this pic I am spotting the holes using a 1/4 inch, 90 point, M42 Cobalt spotting mill.
When I am spotting I clamp a fence to the machine table to help get everything square.  Then I use the cam action table clamps to hold the plates to the table.  I am using the same sacrificial block that I had used on the UABMM2 plates so the holes will line up when I assemble the stack.  After spotting I bored out the holes to 1/2 inch with the step drill.  Then I am using the sacrificial block to hold the stack together while I machine the shapes into the plates.  So I needed to countersink the holes in the corners on the back of the sacrificial block to accept the grade 8, 1/2 inch, countersunk machine screws that hold the stack together during the machining process.
The pivot stud in the middle of the plate is jammed into the table so it won't move.  It is the center of the radiused cuts, while the cam action table clamps keep everything tight during each individual cut.  The alternative to doing this is getting a Rotary Table, which are pretty expensive.  This is my low cost work around.  Now the stack is assembled, and the table is set up to do the radiused cuts, and the next time I can get to the shop I am ready to start cutting the new bearing plates.
I also got a piece of the 1/2 inch shaft cut, and fitted the split shaft bushing on to it.  I need to machine a slot in the shaft for a 1/8 inch shaft key to lock the split taper bushing on to the shaft.  So I made good progress yesterday in relatively little time.  Can't wait to get back to the Metal Shop...

Deep Fried Fish Spring Roll

Feeling adventurous before the Cowboy game on Sunday, wanna make some delicious nom-noms for watching the game.  I've had the idea of Fried Spring Rolls in my head for a week or so.  Seems like a good idea.  The filling for a spring roll is usually rice noodles, Bean sprouts, and seafood, but I am thinking more like an Egg Roll with a Rice paper wrapper.  I think we'll use Cabbage, Carrot, and Onion for the vegetable part of the filling.
I used the grater to shred the Carrot, then the Cabbage and Onion were finely sliced.  Also later decided to put several cloves of Garlic in the filling as well.
Then for the seafood I used Whiting, which is a pretty unremarkable fish, but its cheap, and I like it.  I usually buy fish frozen, so I thawed out about a pound of Whiting.
I've never attempted a Egg Roll, or a fried Spring Roll before, so just winging it here.  I have some Asian cookbooks and did browse them before doing this, and sort of felt like I had a good idea of what to do.  I wanted to precook everything that was going into the roll first, but not fully cook, and let the frying process finish off the cooking.  So, I start by sweating the Onions, with some Red Chile flakes, and salt.
Then I'll add the garlic.  The strongest flavored foods hit the pan first, and then we'll add the bland foods, and they can pickup the Onion, Garlic, and Red Chile flavor.
This is a Stir Fry process so it goes quickly.  I have a Bamboo Wok Tools that I use to toss the pan's contents around.  A lot of my cooking happens in a Stir Fry Pan, even non-Asian foods.  I just love these pans, they are almost indestructible.
Here we toss in the Carrot and Cabbage, and mix them together well.  A Stir Fry Pan should be really hot, and you need to keep the contents moving.  If you don't then the food on the bottom can over cook, and the food on the top can be undercooked.
Then within a few minutes everything is to the target doneness.  We'll take the vegetable filling and put it into a bowl to cool while we prepare the rest of the ingredients for the Spring Rolls.
Chinese Mustard is something I like on Egg Rolls, but don't have any.  So, I decided to fake it.  Chinese Mustard is strong, and sweet, So my improvisational condiment will use Yellow Mustard, Honey, and Wasabi.
This probably turned out to be the best part of what I made today.  As you'll see soon, my grandiose dreams of homemade Deep Fried Fish Spring Rolls didn't turn out for the best.
Next I poached the fish, so it would be partially cooked going into the Spring Rolls.  I used some water in the Stir Fry pan, and let the fish have a nice warm bath before hitting the fryer.
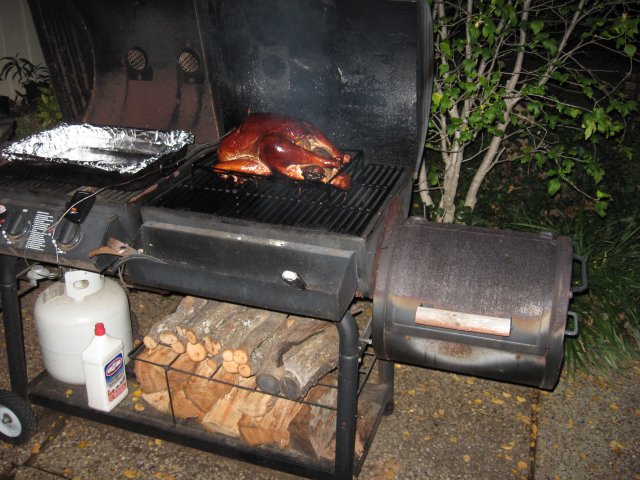
While the fish were poaching I prepared the deep fryer.  I use vegetable oil in the fryer, and preheat it up to 350 degrees Fahrenheit.  Next to the fryer, on the left, is a sheet pan with a rack to drain the Spring Rolls after they come out of the fryer.
Now, on with preparing the Spring Rolls.  We have all the filling ingredients precooked, and all we have to do is assemble them.  I have a pan of hot water to soak each Rice paper wrapper for a few seconds first.  Then I'll transfer them to the assembly station where I add some of the vegetable filling and a slice of fish.  Then roll them up like an Egg Roll, Spring Roll, or a Burrito.
The vegetable filling, and a pound of Whiting was enough to make 11 Spring Rolls.  The rice paper will get sticky as it starts to dehydrate, so you gotta keep 'em separated.
Unfortunately I don't have any pictures of the frying process.  What happened next put my endeavor into a crisis mode, and I was busy trying to save my Spring Rolls, so I wasn't even thinking about the camera.  The fryer was up to temperature, the Spring Rolls were ready, I got all of the unnecessary stuff out of the way, ready to go...

When the first two Spring Rolls hit the oil things went awry, Doh!  The Rice paper is very elastic, and when the filling started to give off steam they puffed up like balloons.  I'm thinking, OK, this is normal.  The the Rice paper burst, and the contents of my Spring Rolls exploded into the oil, oh crap!  So that was the first one, and I am thinking maybe I didn't roll it tight enough.  After a couple more blowouts I was feeling pretty defeated, and the results were pretty ugly...
So, after the initial failure, I went searching for answers, and consulted my Chinese cookbook.  Their method of deep frying was just about a half inch of oil in the Stir Fry pan, and not a deep fryer.  So I grabbed the Stir Fry pan, and got it fired up over medium heat, and transferred a cup and a half of hot oil from the deep fryer to the Stir Fry Pan.  With this method the Spring Rolls were not totally immersed in the hot oil, so they didn't have the adverse reaction of puffing up and exploding.  They did swell up a bit, but not like in the deep fryer.  Well, this is a relief.  The remainder of the Spring Rolls were salvageable, but my technique is still lacking...
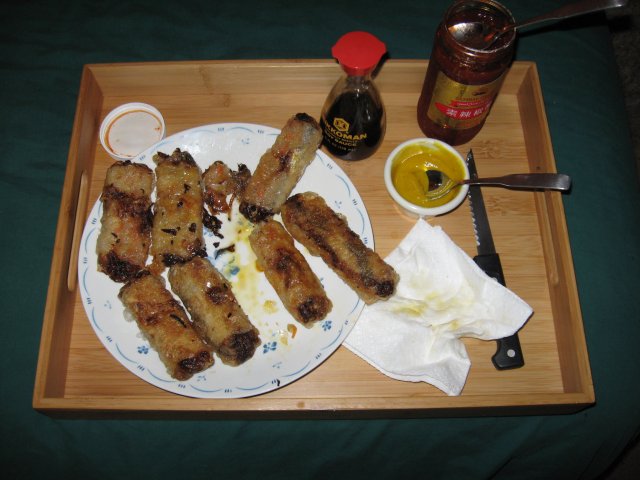
So, by this time I had missed the first half of the Cowboy game, and the kitchen looks like a hurricane had just came through it.  Everything is coated with a fine layer of fryer oil, and I'm exhausted.  So, I take my half-assed, oil saturated Spring Rolls, and went to watch the game...
They weren't totally bad.  The fish was overcooked, the vegetable filling was saturated with fryer oil, on some of them, and no didn't eat them all.  The Honey, Mustard, Wasabi sauce was good.  But I did get a crash course in making fried roll thingys, and wound up sleeping through the rest of the game.  Well, at least the Cowboys won...