Sunday, September 22, 2013

Fire Roasted Salsa

I've been experimenting with Meso-American flavors again.  Fire, Chile, Onion...  Mediocre ingredients are transformed by the process into something that can be delicious nomnoms.  There is analogy to my Pizza here where modest, almost boring ingredients become really awesome because of the process.
I've whittled the list of ingredients down to where you can make a Pint at a time.  Two slices of a white onion, up to four fresh Jalapenos, up to three dry Cayenne Chile, a 14.5 ounce can of Whole Tomatoes, ground Comino (Cumin), and Sea Salt.  If you want Hot Salsa add all of the ingredients.  If you wand mild Salsa then I have further instructions below.
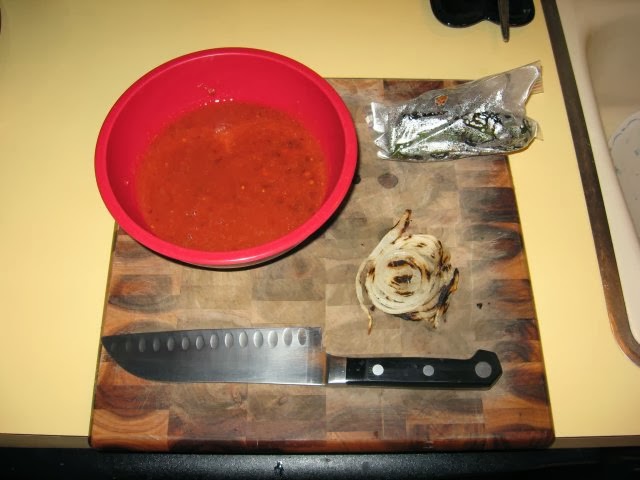
Here is the Fire Roasting part.  Crank up the gas grill to high, and char the slices of Onion, and Chiles.
While the Chiles are roasting put the Tomatoes, two teaspoons of ground Comino, and two teaspoons of Sea Salt in the food processor.  Use a culinary scissors to chop the Cayenne Chiles into smaller pieces.  To reduce the heat level use one Cayenne Chile instead of three, but there needs to be at least one in there.
In the meantime the Chiles have been getting happy.  I pulled the Onion off already.
When the Chiles come off the fire seal them in a plastic bag for fifteen minutes.
The Tomato mixture in the food processor gets pureed, and these parts will come together.  I'll dice up the grilled Onions, and add them to the puree.  The Chiles will need a little more work...
When the Chiles are roasted they produce steam internally.  The outer skin of the Chile is water proof, and the steam will not go through it, so they puff up and steam from the inside out.  The skin is charred from the fire, and not really appetizing, so we will remove them.  Letting the Chiles steam in the plastic bag loosens the skin, and makes it easier to remove.
OK, here we have removed the Chile skins, and are ready to prepare the Chiles for the Salsa.  This is where you can take the heat out of the Chile.  we have cooked the Chile and it is very pliable right now, and we can filet it easily.  We will remove the Calyx, and then slice the Chile down one side.
Then We'll splay the Chile out so that all its insides are up.  This exposes the seed membranes and seeds,  Now you can use the Knife to remove the seed membranes and seeds easily.  Then dice the remaining Chile flesh, and add it to the Salsa.
There are those who don't like the heat, and you can make very mild Salsas using this method to take the heat out of the Hot Chiles you use to make Salsa.  You can also tune the heat using this method.  For example I am making this batch Hot, so I am leaving the seed membranes and seeds in two of the Jalapenos
 I am adding to this batch.  I got a need for the heat...
Then there are few additional details at then end that are more spontaneous like Cilantro, or some citrus juice.  This time I am adding some chopped Cilantro.  Depending on the occasion there are a number of flavor bias that can be added, like Camerones, dry Cranberries, Garlic, or Bhut Jolokias...
This one has three dry Cayenne Chiles, four Jalapenos, two with seeds, so it is pretty hot.
But with this one you can dial the heat in, and make it your favorite...

Thursday, September 19, 2013

Garlic Dill Sour Pickles 2

These are the Garlic Dill Sour pickles a week in, well 8 days.  A couple days ago I made a bottle of Garlic Jalapeno Sour Okra Pickles also.  The bottles are open on top and the the Garlic Dill aroma is strong around the bottles in the corner of the kitchen counter.  The Home Grown bottle seem to be doing better than the store bought bottle.  The home grown bottle brine is clearer than the store bought bottle.  Also the home grown bottle is outgassing while the store bought bottle not so much.  Its making me hungry thinking about them.  I'll try them soon...

Friday, September 13, 2013

Garden Fence 3

I've had the time to work on the fence again.  Both the gates were a bit wonky, and needed to be adjusted.  The North gate hinge post was canted tward the ground, and made the gate, uh funny.  So I adjusted the hinge post about three degrees, and corrected it.  The South gate was just a bit too wide.  So I took it apart and adjusted its width by half an inch to make it fit right,
Then I got busy with the Redwood stain.  I tried a little of this stain here and there, and it started to look good, so I kept going.  We only bought a gallon, but it was more than enough to cover the outside of the fence, part of the greenhouse, and the patio furniture.  It will take another gallon to finish the greenhouse and the other side of the fence.
The garden is looking a lot better, but not where I want it yet.  I'm still pushing around ideas, and getting ready to transition to the winter garden.  The Thai Basil pops up wherever it likes, so I pull them out regularly, like weeds.  The Chiles are not nearly up to standard.  Both them and the Tomatoes like a nice, cool, early planting.  What I planted this year wasn't in the ground until June. or July, so they never got a firm foundation.
The large plants in the background are the Cayenne Chiles, the one thing that got planted early enough to root well before it got hot.  On the left side along the fence are Cucumbers, and I did get enough to make a jar of Pickles.  I've recently planted Turnips, Radishes, Lettuce, and beans, which are all pretty small right now, and suffering in the heat.  Over the next few weeks temperatures should be coming down, and we should get some more precipitation, so things are looking up for the garden.

Tuesday, September 10, 2013

Garlic Dill Sour Pickles

I've got a little harvest of pickling Cucumbers from my garden finally.  Time to make Pickles.  I've had some time to ponder pickles recently, and refined my process a little.  I'm still doing small batches to experiment with the salinity, and flavoring of the Pickles.  The Rosemary Garlic Pickles were pretty weird.  This time I secured some Dill, and also enough Cucumbers from Rosemeade Market to make a comparison bottle.
The Rosemeade Cucumbers are on the left, and my homegrown Cucumbers are on the right.
I cleaned the Pickle bottles, and added a bed of Dill at the bottom of the jars.
Then added come chopped Garlic.  Next the Cucumbers go in.
Fill the bottles until the brine covers the pickles, and use another smaller bottle filled with water to hold the Cucumbers beneath the brine.  The brine is 5% Salinity in Vitalized water.
These will sit on the counter in the kitchen until they start to fizz.  That is what happens when the Lactobacillus culture starts to thrive.  When the Lactobacilli are happy they give off carbon dioxide, and the pickle juice will fizz when agitated.  After getting to this point you can put the jars in the fridge for storage, or let them hang out on the counter longer to make the Pickles more sour.  Letting the Pickles ferment for a longer time will increase the Lactic Acid content, making the Pickles more Sour, Mo Betta...

Chili Fresco

I had the opportunity to use the box, and decided not to.  Its the end of summer so I'm making Chili with as many fresh ingredients as possible.  I have some Hatch Chiles from Rosemeade Market.  Also there are the fresh Cayenne Chiles out of my garden.
So the meat base of my Chili is a pound of 73/27 ground beef, and a pound of hot breakfast Sausage.  Brown the meats in a stock pot, and add some Sea Salt.  With the Chili Fresco we want to add the flavorings quickly to the browning meat.
Add a diced medium sized Onion and 5 or 6 cloves of minced Garlic.
Add 5 Cayenne Chiles chopped.
I didn't have the canned Tomatoes I usually use, and substituted two large fresh Tomatoes, diced.
Then go in the Hatch Chiles, diced, with stems and seeds removed.
Then there are a couple things to be added to make it more Chili like.  Namely Cumin.
Finally, Paprika, to give it a deep red color.  That's it, Chili Fresco...
Let it simmer for a while, maybe add a little moisture, like Ale.
Chili Cheeze Eggs...