Monday, December 10, 2012

Late Fall Harvest

Got the word over the weekend that the first freeze would be Sunday night.  In fact we even got some snow on Monday morning.  Its always cool to catch the first snow of the year, even if its at 4 AM...
So Sunday afternoon I pulled all the fruit from the plants in the garden.  The was an abundance of Cayenne Chile this time.  I have two bushels of green Tomato clusters.  The Jalapenos are tiny this time.
Cayenne Chiles in the wash.
Drying the Cayenne Chiles before the dehydration process.
Green Tomato clusters, either pickles, or Fried Green Tomatoes.
The Habaneros were not as prolific this year, and produced some Red Savinas.
The Jalapenos turned out extra small, and extra hot this year.  I need to look at my organic soil composition.  This year I only used composted yard scraps as fertilizer, and maybe it needs a little more.  Both the Habaneros and the Jalapenos performed less than I had hoped.  There are two issues with the garden now, nutrition, and light.  My large trees shade the garden in the afternoon.  The nutrition is less of a problem, I can solve it by changing the nutrient mix when I till the garden in the spring.  But getting the light back requires trimming the trees, and that we don't want to do.

Monday, September 17, 2012

Sauerkraut

Once I started doing this fermented foods thing it keeps getting easier, and I find that my body really likes the home made Sauerkraut more than anything I can buy at a store.  My wife is the same way about my homegrown Tomatoes, and doesn't like store bought Tomatoes any more.
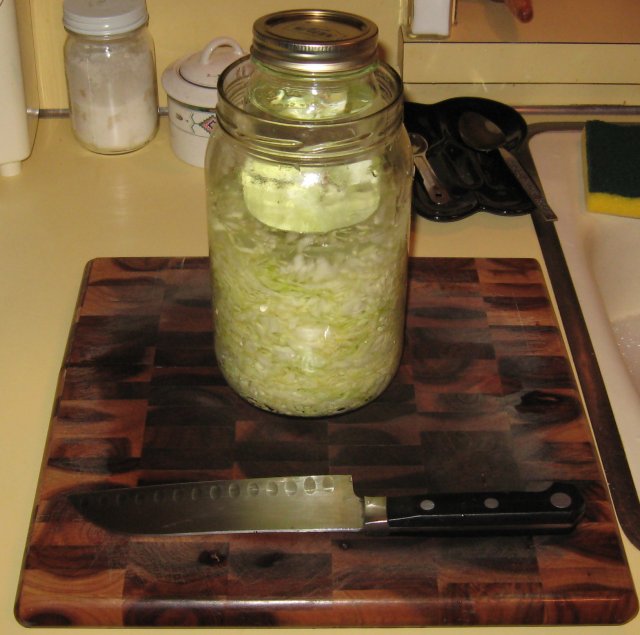
And, its so easy, just Cabbage, Sea Salt, and time makes the most awesome Sauerkraut.  We're going to shred this cabbage, and Salt it liberally, stuff it in a jar, and wait for it to turn into Sauerkraut.
It took like five minutes total to prepare the Cabbage, shred it, salt it, stuff it, and done.
Then I'll add a little, maybe a cup, of brine to have a little liquid over the top of the Cabbage.
Then use another smaller jar filled with water to hold the cabbage down.  Then we wait...

Tamales with Chili Sauce

Craving Mexican food again.  This time I'm going to make Tamales with Chili Sauce.  We'll start with the Tamale Doh!
Two cups of Masa for Tamales, Two cups of water, 2/3 cup of Bacon Fat, 1 teaspoon of Baking Powder, and 1 teaspoon of Sea Salt.  Then everyone into the mixer for a spin.
In the meantime I prepared some Beef Taco filling with off the shelf Taco Spices, and soaked the Corn Husks in cold water.  Spread some Tamale Doh! on each Corn Husk, and Add some Beef Taco Filling inside.
Roll the up so the Tamale Doh! covers the Beef Taco filling, and repeat until you have used up the Tamale Doh!
The Chili Sauce is Carroll Shelby's Chili Mix, a pound of ground Beef, a 14.5 oz. can of whole Tomatoes, a 8 oz. can of Tomato sauce, and 8 oz. of water.  That will simmer down for about an hour.
We'll finish rolling the Tamales, and get them ready to go into the steamer.
The Tamales will steam for an hour.
After the Tamales come out of the steamer they need to cool for a while to set the Tamale Doh!
Here is the final product.  Not as pretty as I would have liked, but tasty none the less...

Kimchi 2

That first batch of Kimchi is really Hot and Garlicky.  I like it, but a lot of other people wouldn't.  So, I made another batch that is milder.  Also this time I didn't use Fish Sauce.  Instead I used brine to make the Sambal.
The one thing I am missing here is Ginger.  The Ginger would temper the sharpness of the Garlic, and then it should taste more like it should.  That is the way I learn, by doing.  Maybe within a few more batches I'll have it down.

Saturday, September 8, 2012

Texas Summer Snow

Last night we had a cold front roll through North Texas, and we got some snow.
For us this is a regular occurrence, we get snow all summer this way.  The front last night had 20 MPH winds, and it is usually when we have considerable winds when we get this snow.  I'll make a Barbeque dinner for you if you can tell me what this snow is...
In my yard it snows all summer, but its better when we have a storm front come through, and there is wind...

Sunday, September 2, 2012

Kimchi

Kimchi is somewhat analogous to Sauerkraut.  It is the National Dish of Korea, and has spread across the world because of its awesome Hot and Sour taste.  It is a fermented Cabbage, which is like old school pickling, before the Industrial Age.  Traditional Sauering and Pickling techniques may not be as quick as modern sterilization techniques, but they are certainly better tasting, and way more nutritious.  Making Kimchi is a process and once you know rules and procedures of the process it is not too difficult to make.
First of all there are no hard and fast rules, not even a specific recipe.  The ingredients are open to interpretation, and many people make their own variations, based on their taste.  Maybe the two things that really have to be there are Napa Cabbage and Sea Salt.  This time I am going to add some diced Daikon Radish also.  I had previously prepared some Brine, which is 4 cups of water, and 4 tablespoons of Sea Salt.  Bring the water to a boil, add the salt and dissolve it all the way, then let the brine cool to room temperature.
I'm only going to add one Daikon, I'll peel it first, then dice it.  There are many other vegetables that could possibly be used in a Kimchi.  There are spices in Kimchi, but we will do that later..  First we need to brine the vegetables for 24 hours before we do the final assembly of the Kimchi.
The end of the Napa Cabbage will look like a flower when the process when it is done, so we don't want to toss it.  Then I'll rough chop the rest of the Napa Cabbage, and Daikon Radish.
I am going to add some whole garlic as well, so we need to brine them along with the rest of the vegetables.
Next we'll put the chopped vegetables and and cooled brine into the jar, this one is two quarts.
Then we'll use another sterilized jar filled with water, which fits inside the other sterilized jar to hold the vegetables down during their soak in the brine.  The vegetables will stay in the brine like this for 24 hours.
Now we are going to add the spices to the Kimchi.  First we're going to drain the brine from the vegetables, and reserve it for later.  Then we'll need a large mixing bowl to combine the vegetables with the Sambal, or the condiment (sauce).  I am going to make Chile Garlic Sauce (Sambal) for our Kimchi.
Chile Garlic, hmmm, sounds like something I know a little about.  These are the Cayenne Chiles from my mid-Summer Harvest.  It's not precisely the right Chile, but they're pretty close.  Kimchi would probably be made with something more akin to a Thai Chile.  So I'll take 15 of these Cayenne Chiles and put them in a steamer for 15 minutes.
Rehydrating the Chiles will help them to integrate into the Kimchi faster.  You can add dried Chiles to the Kimchi, or even Chile powder.  Some people may want to use less Chile, for me its full tilt Cayenne.
The ingredients for the Sambal are 15 Cayenne Chiles, 15 Garlic cloves, a teaspoon of Sea Salt, and 2 tablespoons of Fish Sauce.  The yield for a batch like this is about a quart of Kimchi, so there is a lot of Chile Garlic flavor relative to the amount of vegetables.  So this one will be extra Hot and Garlicky.
Then we'll put the Sambal Ingredients in the food processor and turn it into a paste.  A Hot and Garlicky paste.
Then we'll add the Sambal to the brined vegetables.  You may want to put some Vinyl gloves on at this point.  While the Cayenne Chile is not nearly the hottest Chile, a large concentration can irritate your skin.
Mix the Sambal, and the brined vegetables together thoroughly.  You want to get some Sambal on every piece of Cabbage.  Notice the Napa "Flower" in the middle there.  I think that is my favorite part.
Finally we'll pack the Kimchi into a sterilized one quart jar.  It really needs to be packed in there.  This one had enough moisture because of the Fish Sauce, but if you need more liquid when packing the Kimchi add some more brine.  After the jar is totally packed full I will use another lid, which fits inside the quart bottle, to hold the Kimchi down.  The Kimchi needs to vent as it ferments so we want a liquid seal on top of it to let the Carbon Dioxide out, but prevent external air from getting in.  There are many systems to do this, and what I am using is probably the most basic, an inverted lid filled with brine.
The Kimchi will need to ferment at room temperature for a week.  During that time you will need to keep an eye on the top of the jar.  The Kimchi needs to remain submerged beneath the brine/Sambal.  You want to keep most of the liquid isolated from external air.  You need to check and clean the lid at least once a day.  Add brine if you need to bring the liquid level up.  Once the fermentation has peaked then you can put the correct lid on the bottle, and store it in the refrigerator for Kimchi on demand.  Mine doesn't last very long once its ready.  I can eat a pint of Kimchi within a day, so a quart is only a two day supply.

Chipotle Chiles

Rolling into Harvest Time I always have some Jalapenos that have turned red.  The Jalapeno is usually thought of as a green Chile, and it is until it is fully ripened, and turns red.  The green Jalapeno has large concentrations of Chlorophyll, Vitamin C, and Capsaicin.  When the Jalapeno ripens and turns red the Chlorophyll and Vitamin C get converted to Beta Carotene and Sugars, making the red Jalapeno sweeter and less hot.  There is a distinct flavor difference.
I picked through the mid-Summer Chile Harvest and pulled out these beautiful ripe Jalapenos to make Chipotles.  The Chipotle is a Hickory Smoked and dried ripe Jalapeno.  The first step in this process is to clean and inspect all the Jalapenos.  Don't used Jalapenos with bad spots, because after they are dried you will not be able to distinguish a bad spot.  Then we go right into the smoker next.
I'm going to cook them the same way I cook my smoked meats.  An indirect hickory fire, and a long, slow cooking time.  The lower the temperature the better this process works.  It might take an hours and a half to cook those Chicken pieces, and the Chipotles will stay in there the whole time.
Now, about an hour and a half later, we are ready to transfer the Chipotles from the smoker to the Dehydrator.  The temperature in the smoker is around 250 degrees Fahrenheit, and the Dehydrator is around 170 degrees Fahrenheit.  The Dehydrator also has forced induction, a fan, which circulates fresh air into the dehydrating chamber.
They will stay in the Dehydrator until they are dry enough to be considered preserved, probably less that 20 percent of their original water content.  There is a gradient here also.  When a Chile has really low moisture it will become brittle, which is sometimes what we want.  When a Chile has more moisture it is more pliable, maybe like Raisins.  There are preferences, but the dryer chile will have the longer shelf life.
Here are the finished Chipotles.  They can be stored like this, or you can put them into the Adobo (Tomato) Sauce, which is a common practice in Meso-America.  They are good either way.  When you go to use the dried Chipotles you will have to rehydrate them, and I usually use a steamer.  The Chipotle in Adobo can be used as they are, may want to take the stem off first.
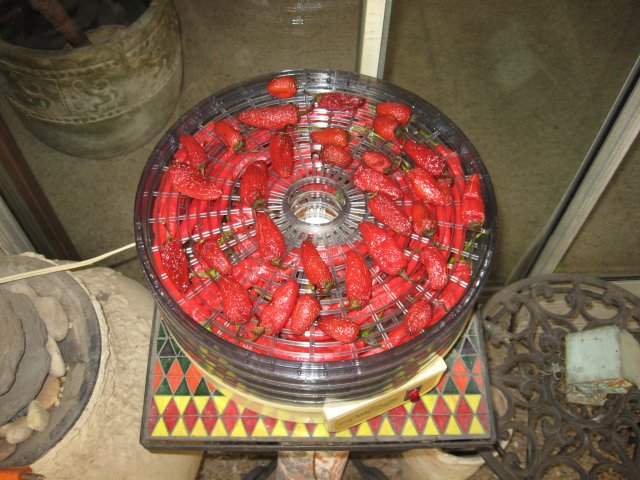
I also had some Cayenne Chiles in the Dehydrator as well.  These are good in anything...

Dried Fruit

Preservation of the harvest is of primary importance at the time of harvest.  Some foods require little preservation such as Potatoes or Onions.  But there are some foods that require quick preservation like Peaches, Cherries, and Chiles.
With Cherries most people would quickly think to preserve them as a Jam, which are actually called Preserves.  Preserves are great, but I was thinking more portable, and less sugar.  Dehydrated Cherries are good to eat just as they are, or mixed with a snack nut mix.
When the water in the Cherries evaporates their flavor intensifies because it becomes concentrated.  Cherries have a mix of sweet and tart.  This is way better than any candy.  The sugars get squeezed out of the cells as the cells shrink during the process, and this makes them sticky.  They stuck to the dehydrator shelf.
The difference in color is dramatic.  You could probably put a coating of pectin on the exterior if you wanted the finished product to be lighter.  Another fruit I tried dehydrating is Figs.  A neighbor has a Fig Tree, and it is super abundant, so he's giving them away like crazy.
The Figs are too big to fit in my dehydrator, so we'll Sun Dry them.  There are many ways to cure Figs, and the one I picked is Sun Drying, because its August, in Texas.  Got plenty of heat out there.  I didn't get a picture of the finished product, but like the Cherries, they turned darker as they dehydrated, and became much sweeter.  Using a sheet pan is probably not the best way to do this.  Next time I'll make a dehydration box that has screens on it to keep the critters out.

Thursday, July 26, 2012

UABMM2 Unfurled 4

This morning I depopulated the eight degree rotor to put the magnets on the ninety degree rotor.
 On the new rotor the magnets fit well in the slots, but they are not "jammed in" tight.  They need some help maintaining their position.  So I wrapped the perimeter with electrical tape for a test spin.
The electrical tape didn't last long, but I got a few spins in.  The rotor doesn't have the strong cogging like it had with the other two rotors.  It is much easier to start and spins longer with when you give it a spin.  Then the electrical tape tore, and bunched up in the clearance between the rotor and the stator.

Wednesday, July 25, 2012

UABMM2 Unfurled 3

OK, here is the Poly rotor, we're cutting the slots now.  This time using the table clamps to keep the slots straight, and use the Y Axis of the table to move the piece.  It took a few hours to cut 36 slots.
The Polyethylene is a lot softer than Aluminum, and easier to cut.  But, the trade off is the rigidity of the piece.  Where I could probably press fit the magnets in Aluminum, the Poly is too flexible, and I'll need another way to secure the magnets.
I'm thinking that I'll wrap the perimeter with electrical tape to start with.  If that doesn't work then I'll try the quick epoxy.  I really don't want to use the industrial epoxy because this is a test piece, and I want to be able to get the magnets off of it again.
I still have to make the holes to mount the rotor to the split taper bushing.  Then we'll be ready to add the magnets.