Sunday, January 29, 2012

Black Bean Sushi

Beans and Rice are a quintessential staple food for most of the world.
Lets make it Sushi...
I've got a sheet of Nori on the Sushi mat.  Then stick the Jasmine Rice to it.
Add some Black Beans and Cilantro, then roll it up, and slice.
We have the traditional accompaniments of pickled Ginger, Wasabi, and Soy Sauce.
There is a bowl of Egg Drop Soup with Scallions on the side.

Friday, January 27, 2012

Sfincione Arribiata

Spicy Sicilian Pizza, the Sfincione Arribiata has bold spices, making it angry.  This pizza is made with the same Doh that I use for the Thin Crust Pizza, although it is prepared in a different way.  This one pizza has 8 ounces of Doh, and is rolled to fit an 8 inch pan.  Then it is generously oiled with Olive Oil.  It will proof in the proofing box for a couple of hours before we sauce it.
Proofing allows the pizza to rise, and get thick.  Sfincione is Sicilian Pizza, you may have seen the thick crust, usually cut into squares, in the by the slice pizza places.  Sfincione is prepared differently than regular pizza.  First we'll sauce the pie, and add spices, the Arribiata part.  Then bake the Sfincione for 7 minutes at 500 degrees Fahrenheit.  This will set the crust and the sauce, then later we add the toppings and do the finish bake.
A traditional Sfincione will have Herbs, and Fish on it.  Mine, well I'm feeling kinda plain tonight, so I'll go with the Three Cheese, Mozzarella, Parmesan, and Romano.  Believe me, there is plenty of taste in this pie, I added Garlic, Oregano, and Red Chile, the Arribiata, so you're not going to miss the toppings.
Typically Sfincione is made in mass quantities, usually on large sheet pans, then cut into square pieces, and and finish baked per slice to order.  Its a vendor food, which is not bad, but I personally don't need a whole sheet pan of pizza.  So, I have scaled it down into an individual portion.  I make two and a half pounds of Doh in a batch which could be a whole Sfincione, but I portion it down for individual pies.  A thin crust pie is about 5 ounces of Doh, and the Sfincione here is about 8 ounces of Doh.

Thursday, January 26, 2012

Brussels Sprouts Salad

The most curious cruciferous vegetable is undoubtedly is the Brussels Sprouts.  While I like them all, I think the Brussels Sprouts is my favorite, maybe.  They are all good really.  So we're making a salad here not a hot dish like Brussels Sprouts Scampi.  We are also not making Brussels Sprouts Hot and Sour Soup.  Just a salad.
So we'll start with a bed of Iceberg Lettuce, and Cilantro, about half and half.
Then add a ring of thinly sliced cucumbers.
While you wern't lookin' I steamed the Brussels Sprouts for 8 minutes in a vegetable steamer.  Its important to cook the Brussels Sprouts, then cool them, and then slice them.
Don't want to get steam burns on our fingertips...
We'll add some bias sliced Scallions for a little sharpness.
Both the Brussels Sprouts and the Scallions go into a separate bowl to be seasoned.  I'm using Olive Oil, Garlic Salt and Black Pepper to season the Brussels Sprouts.  Mix the Brussels Sprouts mixture well, then dump it into the middle of the salad.
I'll add half a Lemon for a little acid.
Then there is the Yogurt Ranch dressing.  The Brussels Sprouts are cooked to where they still have a little crunch, and not over cooked.  This could be done with Asian flair as well.  Substitute Toasted Sesame Oil for the Olive Oil, and replace the Lemon with Rice Wine Vinegar.

Wednesday, January 25, 2012

Funny Little Tacos

Kokopelli liek Meso-American Food...

These are soft tacos even though they are made with corn tortillas.  I'm making a fairly standard Beef and Cheese Taco, except that the Maize Tortilla shell is soft, and not crispy.  The Maize flavor belongs to the Taco.
Here I've got 4 Maize (Corn) Tortillas on a sheet pan.  They are straight out of the package.  No preliminary cooking.  I will coat the Tortillas with an Olive Oil Spray so the moisture from the Taco meat won't soak through the Taco.  Then also there is a pound of lean ground Beef, browned.  I'll add one of those Taco mix packets and some water, then let the Taco meat simmer on about 20 power to hydrate the spices and cook off the water.
While the Taco meat is cooking I'll shred some Iceberg Lettuce, and chop some Cilantro.  I put copious amounts of Cilantro in Tacos.  The flavor fits perfectly, and its also kind of good for you.
First we'll add the Taco meat, and then some shredded Cheddar, and off to the meltification machine.
About 5 minutes later the cheeze is happy, which makes the Funny Little Tacos happy.
Then we'll add the Lettuce and Cilantro.
Then we'll add some diced Tomatoes.  These are all the same ingredients as a regular Tex-Mex Tacos, except that we are using soft Maize Tortillas, and not a crispy Taco Shell.
I'll take each Taco and fold it in half, and move it to the plate.  Any extra greens and Tomatoes and make a little salad next to the Tacos.  There is the Pico de Gallo on the side, and the Yogurt Ranch dressing.

Speaking of heat, I usually use Cayenne Chile Sauce on my Tacos, but I have a growing stock of super hot sauces that will be getting much larger this coming weekend.  Why?  Zest Fest of course.  Zest Fest is this coming weekend, January 27th through the 29th.  Here is a link to the site...


Can you eat the Heat?
See you at the Atomic Wing Eating Contest...

Cheeze Enchiladas

This Tex-Mex Classic is one of my favorites.  I use a Comal, which is similar to a griddle to prepare the Enchiladas.  I place the tortillas on the Comal to warm them.  When the start getting some color on the bottom, flip them over, and apply the shredded Cheeze to the tops.  Let them cook on the Comal until the Cheeze melts, then pull them off the Comal, and roll them up like Enchiladas.  I usually put three on a plate.  Then I'll cover them with my Chile con Carne, and more shredded Cheddar.  Then they will go into the meltification machine for 5 minutes at 500 degrees Fahrenheit.  When they come out of the oven I add some bias sliced Scallions on top of the Enchiladas, Yogurt Ranch dressing (like a dollop of Sour Cream), and a sliced Black Olive on the Yogurt Ranch.  On the side there is Pico de Gallo and Tortilla Chips.

Game Wings

Sunday, watching the NFL Championship Games, need a mess of hot wings to make it right.  This is the day after my step father's 80th birthday party.  We spent a couple weeks preparing for this party, so I am not feeling like cooking very much.  So I roasted the wings in the oven, rather than cranking up the smoker.  I used my usual Chicken seasoning, which is Tony Chachere's Creole Seasoning, and fresh cracked Black Pepper.  Typically there is Blue Cheeze Dressing with the Wings, but I am using my Yogurt Ranch instead.  There are some celery sticks on the side there.  Then also I have some Pico de Gallo and chips.  There is one unseasoned wing on the plate for Kim, she doesn't like the spicy stuff.  The Wings were great, but both our teams lost the Championships...

Tuesday, January 17, 2012

Friday Night Beefz

After doing the Shotty Mods we iz hungry.  I got a Hickory fire going in the barbeque.  I prepped up some Burgers and Brats.  Also made a pot of chili earlier.  Thought I would try a Chili Cheese Brat Dog.  Mmmm...
What I am doing here is called Hot Smoking.  We're not going to put the meat directly over the fire.  It is off to the side, and we'll close the lid to keep the heat in there.  Then we'll let them cook for about 20 minutes.  Again this is not like grilling, more like baking, well, with smoke.
Ever see a smoke ring on a Burger?  Mine have it. LOL!
We need a Brat Dog Bun, so I am going to modify a Hoagie Roll.
Then add some Hot Mustard, Horseradish too if you like.
I make some cuts in the Brat to make it lay flat, and into the Brat Dog.
Freshly made Chile con Carne.
And cheese on top.
I'll spray the top with Olive Oil, and into the oven for 5 minutes.
 Then a little Horseradish on top.
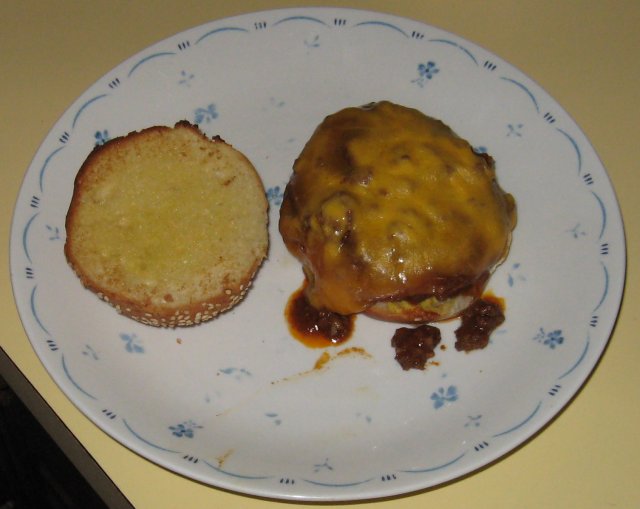
Then lets try a Chili Cheeseburger...
Sesame Seed Bun.
Spicy Mustard and a Smoked Burger.
Cheese.
Chili.
More Cheese, and into the meltification machine.
Mmmm...  Beefz...

Shotty Mods

Adding a side saddle Shell Holder to a Mossberg Shotgun.  The Shell Holder mounts on the left side of the Shotgun, on the other side of the Breach.  But there is a problem.  The Pump Handle interferes with the Shell Holder.  So we are modifying the Pump Handle to clear the Shell Holder.
Before I actually looked at the Shotgun I though the Pump Handle would be a Hard Phenolic Plastic, but it wasn't.  It is a relatively soft ABS Plastic.  Pretty easy to cut.  So we marked the material we wanted to remove.  We isolated the Pump Handle from the rest of the assembly.  Then softly chucked it up in the Vise using wood blocks and shop rags to protect the finish on the Pump Handle.
Here you can see the removed piece in its approximate location relative to the new Shell Holder.  There is about an inch and a quarter of overlap there.  Now we'll start reassembling.
Here we have the Shell Holder Plate positioned.
The Shell Holder Kit comes with all the hardware to do this easily.
Here the Shell Holder Plate is secured.
Next we'll attach the plastic Shell Holder.
And, finish putting the rest of the Shotgun back together.
The Laser Sight is pretty awesome.

Hash and Eggs

You know those shredded hash browns, like at the Loco Diner?  Doing that at home isn't too difficult.  Just take a potato and shred it with a grater.  The trick is to drain off all the juice left over.  You can press the shredded potatoes into a strainer, or use paper towels and squeeze the water out.  The trick is to have the shredded potatoes as dry as possible when they hit the pan.
I use a non-stick skillet, and a little vegetable oil to fry the hash browns.  I'll push them into a patty shape, and let them alone to brown for like 10 minutes.  Then do that pan flip thing to turn them over.  If you poke at them with a spatula they are going to break up.  It needs the pan flip thing...
Once they are nicely browned on both sides fry a few eggs for the top.  Then we'll need some Cayenne Chile sauce to make it perfect.  Then we are ready to get busy for the day...

Sunday, January 1, 2012

New Years Nom Noms

Happy New Year!
Black Eyed Peas are obligatory for the New Years Celebration.  I am totally sick of over complicated holiday food.  Need something simple, like comfort food for the New Year.  Simple Porx and Beans, well, er uh, Peas will do it.  We'll start with a pound of Black Eyed Peas.
The Black Eyed Peas need to soak for several hours before we can cook them.  I'll sort and wash them and then put them in a stock pot, and cover them with vitalized water.  Next Item on the New Years is Garlic Beef.  I'll take a Top Round Steak and marinate it in Garlic, Olive Oil and Sea Salt.
Then we'll take the steak and put it in the fridge for several hours to get that Garlic flavor into teh Beefz.
I had prepped the Black eyed Peas, and Garlic Beefz midday for preparation on New Years Eve.  I started cooking the Black Eyed Peas around 5 PM.  Put the pot on a low simmer, and let them slowly rise up to a simmer.  It takes around 3 hours to cook them this way.
After an hour of cooking the Black Eyed Peas are simmering well.  Then I added two teaspoons of Sea Salt, two teaspoons of Chicken Base, a couple of strips of cooked bacon, and another three strips of raw Bacon.
The cooked Bacon has little fat in it, and I wanted to get a little Porx fat in there, and that is why I added some raw Bacon.  The Black eyed Peas will simmer another two hours, so no worries about adding raw Bacon.
Here, a couple hours later, then Black Eyed Peas are looking nomlishious.  Now we'll prepare the Garlic Beefz.  If I were to grill teh Garlic Beefz the garlic would get burned up.  I want to preserve the Garlic, so I am going to roast the Garlic Beefz in the oven at a low temperature.  Low and slow is unusual for steak.
I wanted to have the garlic roasted correctly, and get the steak cooked.  Low and slow will do that.  I set the oven to 225 degrees Fahrenheit.  After 30 minutes the steak was still a little rare, and it wound up taking about 40 minutes.
Roasted Garlic looses the sharpness that it has when its raw.  It also gains a sweetness.  After I pulled the garlic Beefz out of the oven I let it rest for a while.
When I cut into the Garlic Beefz it has a medium doneness.  I collected all the garlic from the Beefz to make garlic sauce.
The sauce is the Au Ju from the roasting pan, the Garlic, a little butter, and some more Olive Oil.  The Garlic is already cooked, so we only have to heat this, not cook it.
I made some Fries also.  The Garlic part of this is an entire head of Garlic, for one steak.  That's why its called Garlic Beefz.  Then I have a cup of the Black Eyed Peas on the Side.  This is a welcome diversion from the Holiday food.